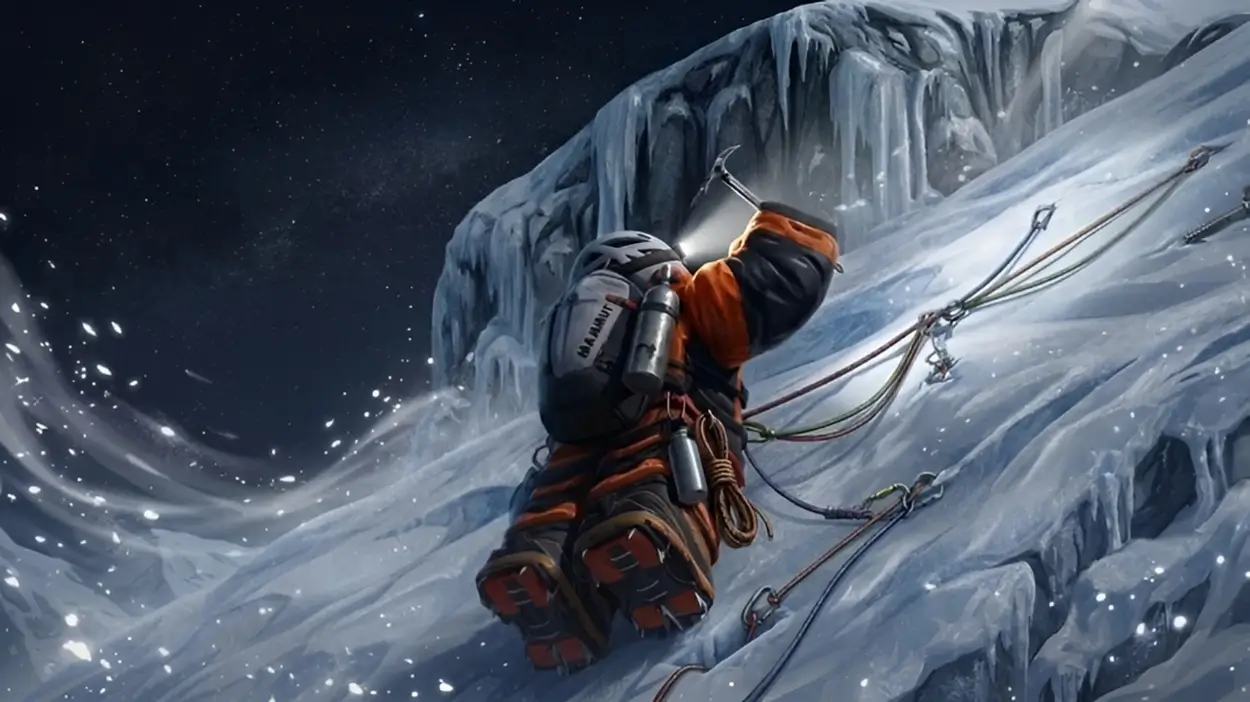
We are going to be completely honest with you. When we first loaded up K2 Climbing Simulator on Roblox, we thought it would be another simple walking game that we would forget about in twenty minutes. It is not. This game grabbed us from the very first snowstorm, refused to let go, and had us genuinely stressed by the time we were dangling off a ridge somewhere above Camp 3 with 19% oxygen left. If you are new to K2 Climbing Simulator and you want to reach the summit without suffering through every rookie mistake the hard way, this is the guide we wish we had before we started. We have put in the hours, watched players fall off the mountain at every possible stage, and we are sharing everything we know right here.
K2 Climbing Simulator is developed by 14PEAKS STUDIOS on Roblox. It simulates a climb up K2, the world’s second-highest mountain at 8,611 meters and one of the most dangerous peaks on Earth. The game earns its reputation for difficulty because it takes that real-world danger seriously. You are not just walking up a hill. You are managing oxygen, conserving stamina, surviving blizzards, navigating ropes, and making moment-to-moment decisions that can send you all the way back to base camp in seconds. The summit badge has a rarity of around 15%, which tells you that most players who attempt the climb do not make it. We will help you become one of the ones who do.
WHAT MAKES K2 CLIMBING SIMULATOR DIFFERENT FROM OTHER ROBLOX CLIMBING GAMES
There are plenty of climbing games on Roblox, but most of them are obstacle courses dressed up as mountains. K2 Climbing Simulator takes a completely different approach. The mountain you climb here is modeled closely after the real K2, following the Abruzzi route along the south-east ridge. The developers have built in real environmental hazards. Blizzards reduce your visibility to almost nothing. Rockfalls come without warning and can knock you off the mountain instantly. The higher you go, the thinner the air becomes, and if you do not manage your oxygen properly, you will start taking damage and eventually die right there on the slope.
What really separates this game from its peers is the survival loop. Every resource matters. Every decision has a consequence. We saw players in our sessions lose forty-five minutes of progress because they pushed past a camp without refilling oxygen, or because they tried to free-climb a steep section without the rope instead of taking two extra seconds to attach it. The game punishes impatience consistently and rewards careful, methodical climbing. Once we understood that, our runs became dramatically more successful. The mindset shift from “how fast can I get up there” to “how do I make sure I survive this section” is the single biggest thing that separates players who summit from those who do not.
ALL WORKING K2 CLIMBING SIMULATOR CODES
Before you do anything else in this game, redeem your codes. This is the single easiest win available to you as a new player. Codes give you free Points, and Points are how you buy gear. Better gear directly improves your chances of reaching the summit. There is no reason to skip this step. Open the game, find the gift box icon in the bottom-left corner of your screen, click it, and enter each code one at a time.
Here are all the currently active codes as of May 2026:
- 10KLIKES – Redeem for free Points
- BETA – Redeem for free Points
- 500K – Redeem for free Points (may be expired, try it anyway)
- D1 – Redeem for free Points (may be expired, try it anyway)
Codes in K2 Climbing Simulator tend to drop around major milestones and game updates. The developer studio, 14PEAKS, announces new codes through their official Discord server and social channels. If you want to stay on top of new codes as they drop, the Discord is your best bet. The community there is also a great resource for route tips and partner finding. We recommend joining it even if you only check it occasionally.
One important thing to note: codes in this game are case-sensitive. If you type beta instead of BETA, it will not work. Always use the exact capitalisation shown, and enter the code carefully rather than rushing through it. A small typo means a missed reward, and in a game where every Point matters for gear, that stings.
UNDERSTANDING THE HUD AND SURVIVAL METERS
The interface in K2 Climbing Simulator gives you a lot of information at once, and it can feel overwhelming when you first load in. There are coordinates, altitude readings, meters, and multiple toggles to manage. Do not panic. Once you know what each element does, it becomes second nature.
Your most important meters are oxygen, stamina, and health. Oxygen depletes as you climb to higher altitudes and can be toggled on or off manually. Stamina drains when you sprint or use your ice axes for climbing. Health drops when you take damage from falls, blizzards, or running out of oxygen without your tank turned on. All three of these meters need to be kept in a healthy range throughout your climb. Letting any one of them drop to zero is usually the end of your run.
Your altitude reading is also extremely useful. It tells you where you are on the mountain relative to key thresholds. The game begins to demand oxygen use somewhere around the 6,950-meter mark. Below that point, you can generally keep your oxygen off to conserve it. Above it, you want your tank running consistently. Knowing this threshold ahead of time stops you from being caught off guard by sudden damage in what feels like the middle of the climb.
Your coordinates help you stay oriented when visibility drops during storms. When a blizzard hits and you can barely see three meters in front of you, glancing at your coordinates and comparing them to where you need to be is how you avoid walking in completely the wrong direction. It sounds simple, but a surprising number of newer players completely ignore the coordinate display and end up lost during their first major storm.
FULL CONTROLS GUIDE FOR K2 CLIMBING SIMULATOR
Knowing your controls before you start climbing is essential. K2 Climbing Simulator has more keybinds than you might expect, and some of them are critical for survival in specific situations. We are going to walk through every important control so you are not discovering them for the first time when you are already fifty meters up a near-vertical ice wall.
Movement uses the standard WASD setup, and Shift lets you sprint. However, sprinting on this mountain is something you have to be very deliberate about. We use sprint only on safe, relatively flat ground during transitions between sections. Running near a ridge, on a steep slope, or during a storm is how accidents happen. Your stamina depletes when you sprint, and more importantly, your control over your character becomes less precise. Slow and controlled beats fast and careless every single time on K2.
The F key is one of the most important buttons in the game. It handles interaction with objects, attaching to ropes, and getting back up after a stumble. Memorise where F is before you need it in a panic. There have been more than a few moments where we slipped and needed to immediately press F to recover, and hesitating for even a second meant the difference between catching ourselves and rolling down the mountain.
Left Control switches you into the climbing camera mode, which gives you a better third-person perspective for navigating narrow ridges and steep sections. We strongly recommend switching to this camera before you hit any technical terrain. The default camera can make it very difficult to read the path in front of you on steep angles. First-person mode is another alternative that some players prefer for precise sections. Try both and see which one suits you better, but do not rely solely on the default view when things get difficult.
The C key wipes your screen. This sounds minor, but it is actually very helpful during storms. Snow and moisture effects can build up on your screen and further reduce your already limited visibility. Pressing C before attempting any precise movement in a blizzard gives you a clean view for that brief window. We always press C before a difficult traverse in bad weather.
For ice axe climbing on vertical sections, you alternate between left click and right click in a rhythm. Each click plants one axe, and together they let you crawl up surfaces that would otherwise be impossible to scale. The key insight that took us a while to figure out is that this works best in Shift Lock mode. Without Shift Lock, the camera and your character do not align properly, and the alternating clicks become much harder to manage. Turn Shift Lock on before you hit your first ice wall section. Pace yourself on these sections too. You do not want to click frantically; you want a steady rhythm that keeps you moving upward without burning your stamina too fast.
For console players, the primary climbing controls are L2 and R2 for your main climb triggers, and R3 for sprint. The rest of the interactions follow a similar pattern to the PC version, with F-key actions mapped to the appropriate face buttons depending on your controller layout.
THE GEAR SHOP: WHAT TO BUY AND WHAT TO SKIP
The gear shop at base camp is where you convert your Points into actual climbing advantages. After you have redeemed all your codes and collected your free Points, head to the shop before you attempt the mountain. This is the step that a surprising number of beginners rush past, and it costs them later. We made this mistake ourselves on our first run, heading up the mountain in starter gear and discovering around Camp 2 that we were completely underprepared for the conditions.
Ice Axe (High Priority): The ice axe is your primary tool for climbing vertical sections. The beginner axe gets the job done, but upgrading it gives you better grip, more efficient climbing, and reduced stamina drain on ice wall sections. If you only upgrade one piece of equipment, make it this one. The difference between the starter axe and even the first upgrade is noticeable immediately when you hit your first major climbing section.
Suit (High Priority): Your suit determines your resistance to the cold and harsh weather conditions higher up the mountain. A better suit means you take less damage during blizzards and snowstorms, which directly extends how long you can stay in difficult conditions without being forced to retreat or heal. Start with a suit upgrade early.
Boots (High Priority): Boots affect your movement on icy and steep terrain. Better boots reduce how often you slip and improve your overall stability on tricky surfaces. On a mountain where one slip can end your entire run, the value of stable footing cannot be overstated. Boots are right up there with the ice axe as one of the best investments you can make.
Oxygen Tank (Medium Priority): Your oxygen tank determines how long your supply lasts before you need a refill. A better tank means fewer stops and more time between base camps without worrying about running dry. If your Points allow it after covering the essentials, a tank upgrade is very much worth having before longer summit attempts.
Goggles (Medium Priority): Goggles help with visibility in storms and harsh weather. They become significantly more valuable above Camp 2, where blizzards hit harder and more frequently. If you are planning a serious summit attempt, goggles are a solid purchase before you head out.
Medkit (Medium Priority): A medkit lets you recover health mid-climb without needing to reach a camp. This is particularly useful for the upper mountain, where camps are spaced farther apart and falling damage or storm damage can leave you in a dangerous state with nowhere safe nearby. We always carry one once we can afford it.
Backpack and Helmet (Lower Priority): These items offer some benefits and complete a more expedition-style loadout, but they are less critical than the items listed above for actual summit success. Spend Points here after you have covered the higher-priority purchases.
One thing the shop also offers is cosmetic customisation. There are suits with different colours and patterns, different helmet designs, and various accessory options. These do not affect your climbing performance but they do look great at the summit. Just make sure you are not spending Points on pure cosmetics before you have the functional gear sorted.
THE ROUTE: FROM BASE CAMP TO THE SUMMIT
The main route in K2 Climbing Simulator follows the Abruzzi ridge, which is marked throughout by red orbs and a red line on the ground. This is your guide from start to finish. Follow it. We cannot stress this enough, especially during your first few attempts. The red line takes you through the safest path, passes every base camp, and keeps you on route during low-visibility storms when it is easy to drift off course. If you ever find yourself unsure which way to go, stop, turn your camera until you can see the red orbs, and head toward them.
The climb is structured around four base camps between the starting point and the summit. Each camp is a critical waypoint where you refill your oxygen, rest, and prepare for the next section. Think of the journey not as one long climb but as five separate segments, each with its own challenges and each ending at a checkpoint where you can regroup.
Base Camp to Camp 1: This is your introduction to the mountain. The terrain here is relatively forgiving compared to what comes later, but do not get overconfident. This section introduces you to the basic climbing rhythm, teaches you how the rope system works, and gives you your first taste of what even a mild weather event can do to your visibility and control. Use this segment to get comfortable with your controls and to practise attaching to ropes every time you see one. When you reach Camp 1, immediately refill your oxygen before doing anything else.
Camp 1 to Camp 2: This is where the mountain starts to get serious. The path becomes steeper, and the weather can turn quickly. Blizzards become more likely and more intense. We had our first genuinely scary moment somewhere in this section when a storm hit with almost no warning and we suddenly could barely see the rope line we needed to follow. Visibility can drop to almost nothing in a serious blizzard, which is why we always switch to climbing camera mode before tackling this stretch. When you arrive at Camp 2, refill everything and do not push on until you are in good shape.
Camp 2 to Camp 3: Camp 3 is actually closer to Camp 2 than you might expect, but do not let that lull you into complacency. The path between them includes some genuinely treacherous sections with steep traverses and exposed ridges. This is also where rockfalls become a real danger. When you hear or see rocks coming, stop moving immediately and try to take cover or wait for them to pass. Running in any random direction when rockfall starts is how you accidentally run yourself off the edge.
Camp 3 to Camp 4: You are now in the death zone. This section is the most technically demanding part of the climb. The slope is at its steepest, visibility is worst, and the combination of thin air and harsh weather makes every decision feel more consequential. Stay attached to the rope. Turn your oxygen on and keep it on. Use your headlamp to help with visibility in the dark sections.
Camp 4 to the Summit: This is the final push, and it is both the hardest and the most rewarding section of the entire climb. Your oxygen will be draining faster here than anywhere else on the mountain. Keep an eye on your gauge constantly. We recommend moving in short, controlled bursts, attaching to the rope after every few steps, and never rushing a section that does not feel safe.
OXYGEN MANAGEMENT: THE MOST IMPORTANT SKILL IN THE GAME
More players fail because of poor oxygen management than any other single reason. We are going to go into detail on this because understanding oxygen properly is genuinely what separates successful summit attempts from failed ones.
At low altitude, below roughly 6,950 meters, you can safely keep your oxygen turned off. There is no advantage to running it at this stage, and doing so just drains your tank unnecessarily. Keep it off, keep an eye on your health, and only turn it on if you start taking damage. Most players will not need oxygen on at all during the base camp to Camp 1 section.
Above the 6,950-meter mark, the situation changes. Your health will start dropping if oxygen is off, slowly at first and then faster as you go higher. The moment you notice any health drain from thin air, turn your oxygen on and keep it on. This is not a situation where you want to experiment with toggling it off to save supplies. The difference between running low on oxygen and having a full tank is the difference between reaching the next camp safely and dying two hundred meters short of it.
Every base camp has an oxygen refill station. Use it every single time you pass through a camp, without exception. Even if your tank is at 80%, top it up. You never know what the next section holds. A surprise storm, an unexpected rockfall that forces you to take a detour, or a challenging climbing section that takes longer than expected can all drain your oxygen faster than you planned.
One practical tip we discovered after a few painful runs: if you are running low on oxygen and you are nowhere near a camp, slow down. Moving slower means you consume oxygen at a slightly reduced rate. It is not a massive difference, but it can give you the extra minute you need to reach the next refill point.
ROPE SAFETY: WHY YOU MUST ALWAYS STAY CLIPPED IN
The rope system in K2 Climbing Simulator is the single most important safety mechanic in the game, and it is the one that new players most consistently ignore until they learn their lesson the hard way. We are going to save you that lesson right now.
Throughout the mountain, you will see rope lines running along the path. You attach yourself to these by clicking on them. When you are attached, the rope acts as a safety line. If you slip or stumble, the rope catches you and stops you from falling. When you are not attached and you slip on a steep section, you will ragdoll and tumble down the mountain. Depending on where you fall, this can mean anywhere from a significant loss of progress to an immediate death and full reset back to base camp.
We watched a group of eight players attempt the summit in one of our sessions. They started together, full of confidence, and most of them were not using the rope. By the time we reached Camp 2, only four of them were still in the run. One player lost an entire hour of climbing in about three seconds because he decided the rope was slowing him down on a section above Camp 3. It was not slowing him down as much as the fall did.
There is never a good reason not to clip into a rope when one is available. The time it takes to attach is negligible. The protection it gives you is enormous. Make it a reflex: see a rope, click the rope, continue climbing. The players who summit consistently are always the ones who treat rope attachment as automatic rather than optional.
You can also rope attach to other players in multiplayer. This creates a connected safety line between you, meaning if one person slips, the others can help hold them. If you are climbing with friends, get into the habit of rope-attaching to each other before the hard parts, not after you are already in trouble.
SURVIVING BLIZZARDS, ROCKFALLS, AND NIGHT SECTIONS
K2 Climbing Simulator throws three major environmental hazards at you repeatedly throughout the climb. Each one requires a different response, and knowing how to handle all three before you encounter them will save your run multiple times over.
Blizzards are the most common hazard and can appear at almost any point above Camp 1. When a blizzard hits, your visibility drops sharply. What you actually want to do is slow down significantly, switch to your climbing camera for better terrain reading, press C to wipe your screen, attach to any nearby rope, and follow the red line. The red orbs that mark the path are still visible even in heavy snow if you look for them. Take small, deliberate steps rather than trying to move at normal speed through a whiteout.
One thing blizzards can do that many players do not anticipate is damage you through cold exposure. Your suit rating matters here. A better suit means less health drain during a storm. If you are in a blizzard with a starter suit and no medkit, you may be forced to push through at a pace that risks other accidents just to get to shelter before you die from exposure.
Rockfalls appear in specific sections of the mountain, particularly between Camp 2 and Camp 4. When you hear or see rocks coming, stop moving immediately. Do not run in a random direction. Look at where the rocks are falling and move perpendicular to their path if you need to move at all. Most of the time, staying still and letting them pass is the safest option.
Night sections dramatically increase the difficulty of navigation. The mountain cycles through day and night, and being caught on a difficult section after dark without your headlamp on is one of the more disorienting experiences the game can throw at you. Turn your headlamp on as soon as it starts to get dark. The headlamp toggle is accessible from your inventory and takes only a second.
MULTIPLAYER VS SOLO: WHICH IS BETTER?
Both multiplayer and solo have genuine advantages, and the right choice depends on what kind of experience you are looking for.
Multiplayer is objectively safer in terms of survival mechanics. Having other players around means you can rope-attach to each other on dangerous sections, creating a literal safety net for mistakes. The social element also makes the tense sections feel less isolating, and there is something genuinely enjoyable about climbing with a group and sharing the experience of reaching the summit together. With a coordinated group moving efficiently, two hours is a very achievable target for a normal summit attempt.
The catch with multiplayer is that you are also at the mercy of other players’ decisions. We have seen groups where one person’s recklessness triggered a chain of falls that took out three players at once. In public servers, the players you find are strangers with varying levels of experience and care for the rope system.
Solo climbing is harder in raw survival terms because every decision falls entirely on you. But solo climbing is also deeply satisfying in a way that group climbing is not. Every decision you make matters entirely, and when you reach the summit alone, you know that every meter of that climb was entirely your own work.
Our honest recommendation: if this is your first or second attempt at the summit, try to find a group or bring a friend. Once you know the route and the mechanics well enough to be confident, try a solo run. It is a completely different and very rewarding experience.
QUESTS AND POINTS: HOW TO KEEP EARNING BETWEEN ATTEMPTS
Beyond redeeming codes, the main way to earn Points in K2 Climbing Simulator is through completing quests and making progress on the mountain. Quests appear in the quest menu and give you specific objectives to complete during your climb, such as delivering supplies to a specific camp or reaching a certain altitude. These quests are worth doing because they reward you with Points that translate directly into better gear for future attempts.
The deliver supplies quests are particularly convenient because they naturally overlap with the path you are already taking. If a quest asks you to deliver supplies to Camp 1 and you are heading to Camp 1 anyway, you are completing the quest simply by playing normally. Check your quest list before you start a climb and try to pick up any objectives that align with where you are planning to go.
Points also accumulate simply from climbing. The higher you reach, the more Points you earn from a run. This means that even failed attempts are not entirely wasted. If you make it to Camp 3 before falling, you have earned more than you would have from a run that ended at Camp 1. Every run contributes to your gear progression, which means every run makes you slightly more capable for the next attempt.
ADVANCED TIPS FOR EXPERIENCED PLAYERS PUSHING FOR THE SUMMIT
If you have done a few runs, understand the basic mechanics, and are looking for the edge that finally gets you to the summit consistently, these are the things we have found make the biggest difference at a higher level of play.
Learn the exact oxygen threshold for your current tank and plan your route around it. If you know your tank lasts approximately three minutes of active climbing before it needs a refill, you can make informed decisions about whether to push a section or retreat to a camp. Running on gut feeling about oxygen is how you end up in trouble.
On ice axe climbing sections, your rhythm matters more than your speed. The common mistake is to click too quickly, which causes your character to lose grip and slip. The optimal rhythm is slightly slower than you think it should be, with each click firmly landing before the next one begins. Find that rhythm in a safe section early in the climb and maintain it through the harder sections above Camp 3.
Treat every storm as an opportunity to practise low-visibility navigation rather than a disaster to escape from. Players who panic in storms make reckless decisions that end their run. Players who slow down, rely on the rope and the red orbs, and move carefully through the storm come out the other side in good condition.
Pay attention to where the death zones are on the mountain, specifically the sections above Camp 3 where a fall means an instant death rather than just losing some progress. In these sections, we recommend moving at approximately half your normal speed, attaching to the rope every few seconds rather than every few minutes, and using the climbing camera to constantly read the terrain ahead.
Finally, know when to turn back. This is the hardest lesson in the game to learn and the one that experienced climbers embrace most readily. If you are at Camp 3 with 30% oxygen, no medkit, and a storm is starting, the correct decision is to retreat and wait rather than pushing into the final section in those conditions. Recklessness gets punished on K2. Smart risk management gets rewarded.
THE SUMMIT: WHAT REACHING THE TOP ACTUALLY FEELS LIKE
We want to close this guide by talking about what it actually feels like to reach the summit, because it is worth it and we want you to experience it yourself.
When you get close to the top, the mountain starts to run out. You notice it gradually at first, and then suddenly all at once. There is less mountain above you than there is below you. The path narrows to its final approach and then opens onto the summit itself. The game recognises your achievement with a message when you arrive, and if you are on a server with other players, they will see it too.
Looking down from the summit gives you a view of the entire mountain you just climbed. Base camp is a tiny speck somewhere far below. Camp 1, Camp 2, Camp 3, Camp 4, all of the places where things could have gone wrong and sometimes did, all visible at once from the top. You can see the exact ridge section that made you nervous, the traverse that caught someone in your group on a previous attempt, the ice wall that took three tries to get right. All of it is below you now.
The summit badge in K2 Climbing Simulator has a rarity of around 15%, meaning roughly one in seven players who play the game actually earns it. When you reach the top, you are in that 15%. The summit does not come easy, and it should not. The entire point of K2 Climbing Simulator is that the mountain demands your respect, your patience, and your best effort. When you give it all three, it lets you reach the top.
We hope this guide gets you there. Follow the red line, stay clipped to the rope, refill your oxygen at every camp, and take your time on the hard sections. The summit is waiting.

Leave a Reply